
This process is not difficult IF you still have a video player device that can play your tapes. For VHS tapes, this means a VHS tape player, of course. For camcorder tapes, either analog or digital, you’ll likely need the camera you recorded them on. If you don’t have the playback unit, you’ll likely have to send your tapes out to a service that will transfer them for you.
Here's one payoff of this process... once converted to digital files and moved to a cloud site, at least three sites (Google Drive, Vimeo and YouTube) have a feature allowing you to start the movie at a specific minute and second of the movie. You'll find this an exciting feature for long-form movies over 15 minutes which may have multiple events on the same movie or tape.
Using an Outside Service
There are dozens of services that will do this for you. Simply search the web for "video transfer" and you'll see many listed, both local and national.
IMPORTANT NOTE: Many of these firms still put your digital videos only on DVD's. To us, this seems like Netflix still delivering DVD's to your home... it's the old way. If you want to move your movies/videos to the cloud for adding to MyFamilyArchive and streaming to all devices, you'll want to ask the transfer company to specifically to transfer your videos to either an MP4, MPEG-4 or .MOV format and put them on a thumb drive or similar storage device. If you get only DVD's, the files will not be in the correct format for cloud storage and you'll need to transfer them again, one by one, using a DVD player (see Help and Blog entries for this). If you want the DVD's as yet another form of backup, that's fine. But you can also start with the digital files noted and transfer these to a DVD. Once you set up MyFamilyArchive, you'll likely never use those DVD's again.
We do not have a service we recommend, but you might consider a local service that has a good customer rating on Yelp or Google reviews. Most charge either by tape or, in some cases, allow you to fill a box with tapes and photos and they'll do the transfers and return them.
Doing the Transfers Yourself
Fortunately for us, one of our old VHS players still worked, and we were able to find the power cords and cables for our old camcorders… one analog Sony camera and two digital Canon cameras. So we went this route, even though we had over 100 hours of tapes to transfer.
Here’s what you do. For all of the video formats, you simply need a product called a “video capture converter”. One end has three of the old RCA-type jacks, and maybe an s-video option, that plug into your VHS-Out port on the VCR, or into your camera or adapter cables that usually came with the digital cameras. The other end of the device is a cable with a USB connector that plugs into your computer. The device will come with software or a software link to download.
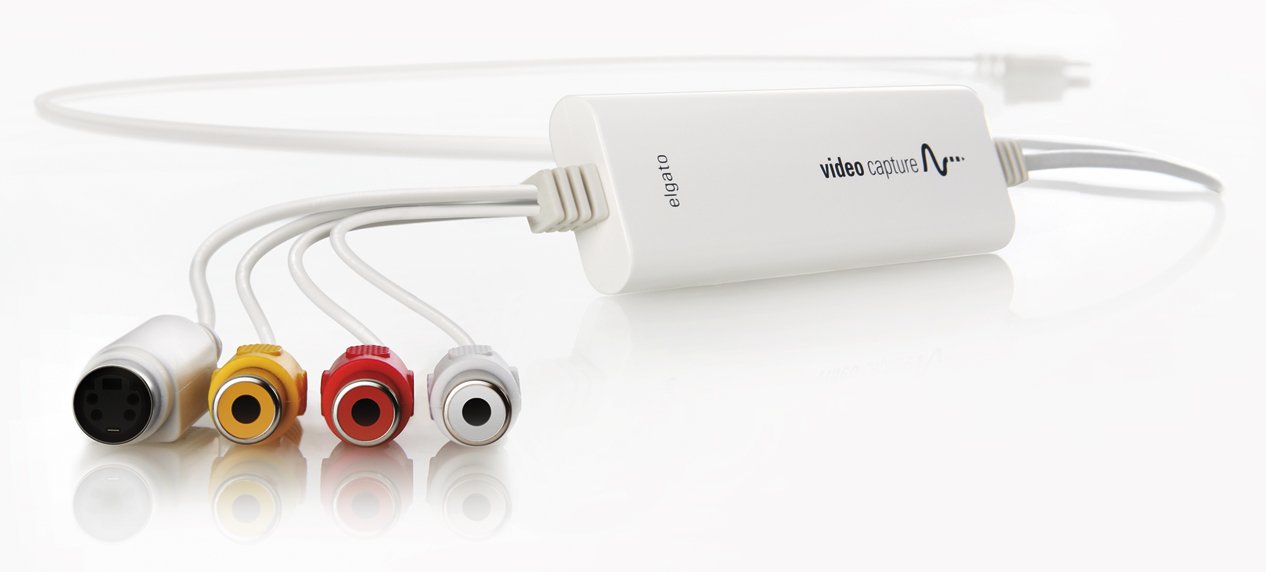
There are several options of converter brands to choose from. We searched online for "video transfer converter” and found converters for as low as $25. We chose a slightly more expensive version from elgato, shown above, as we were familiar with the brand (we received no benefits from elgato). We've since learned that this Elgato device is used by some professional transfer companies as the less expensive ones can sometimes cause sync problems with audio. Given the hours of videos we needed to transfer, we figured the investment was worth it, and it worked perfectly.
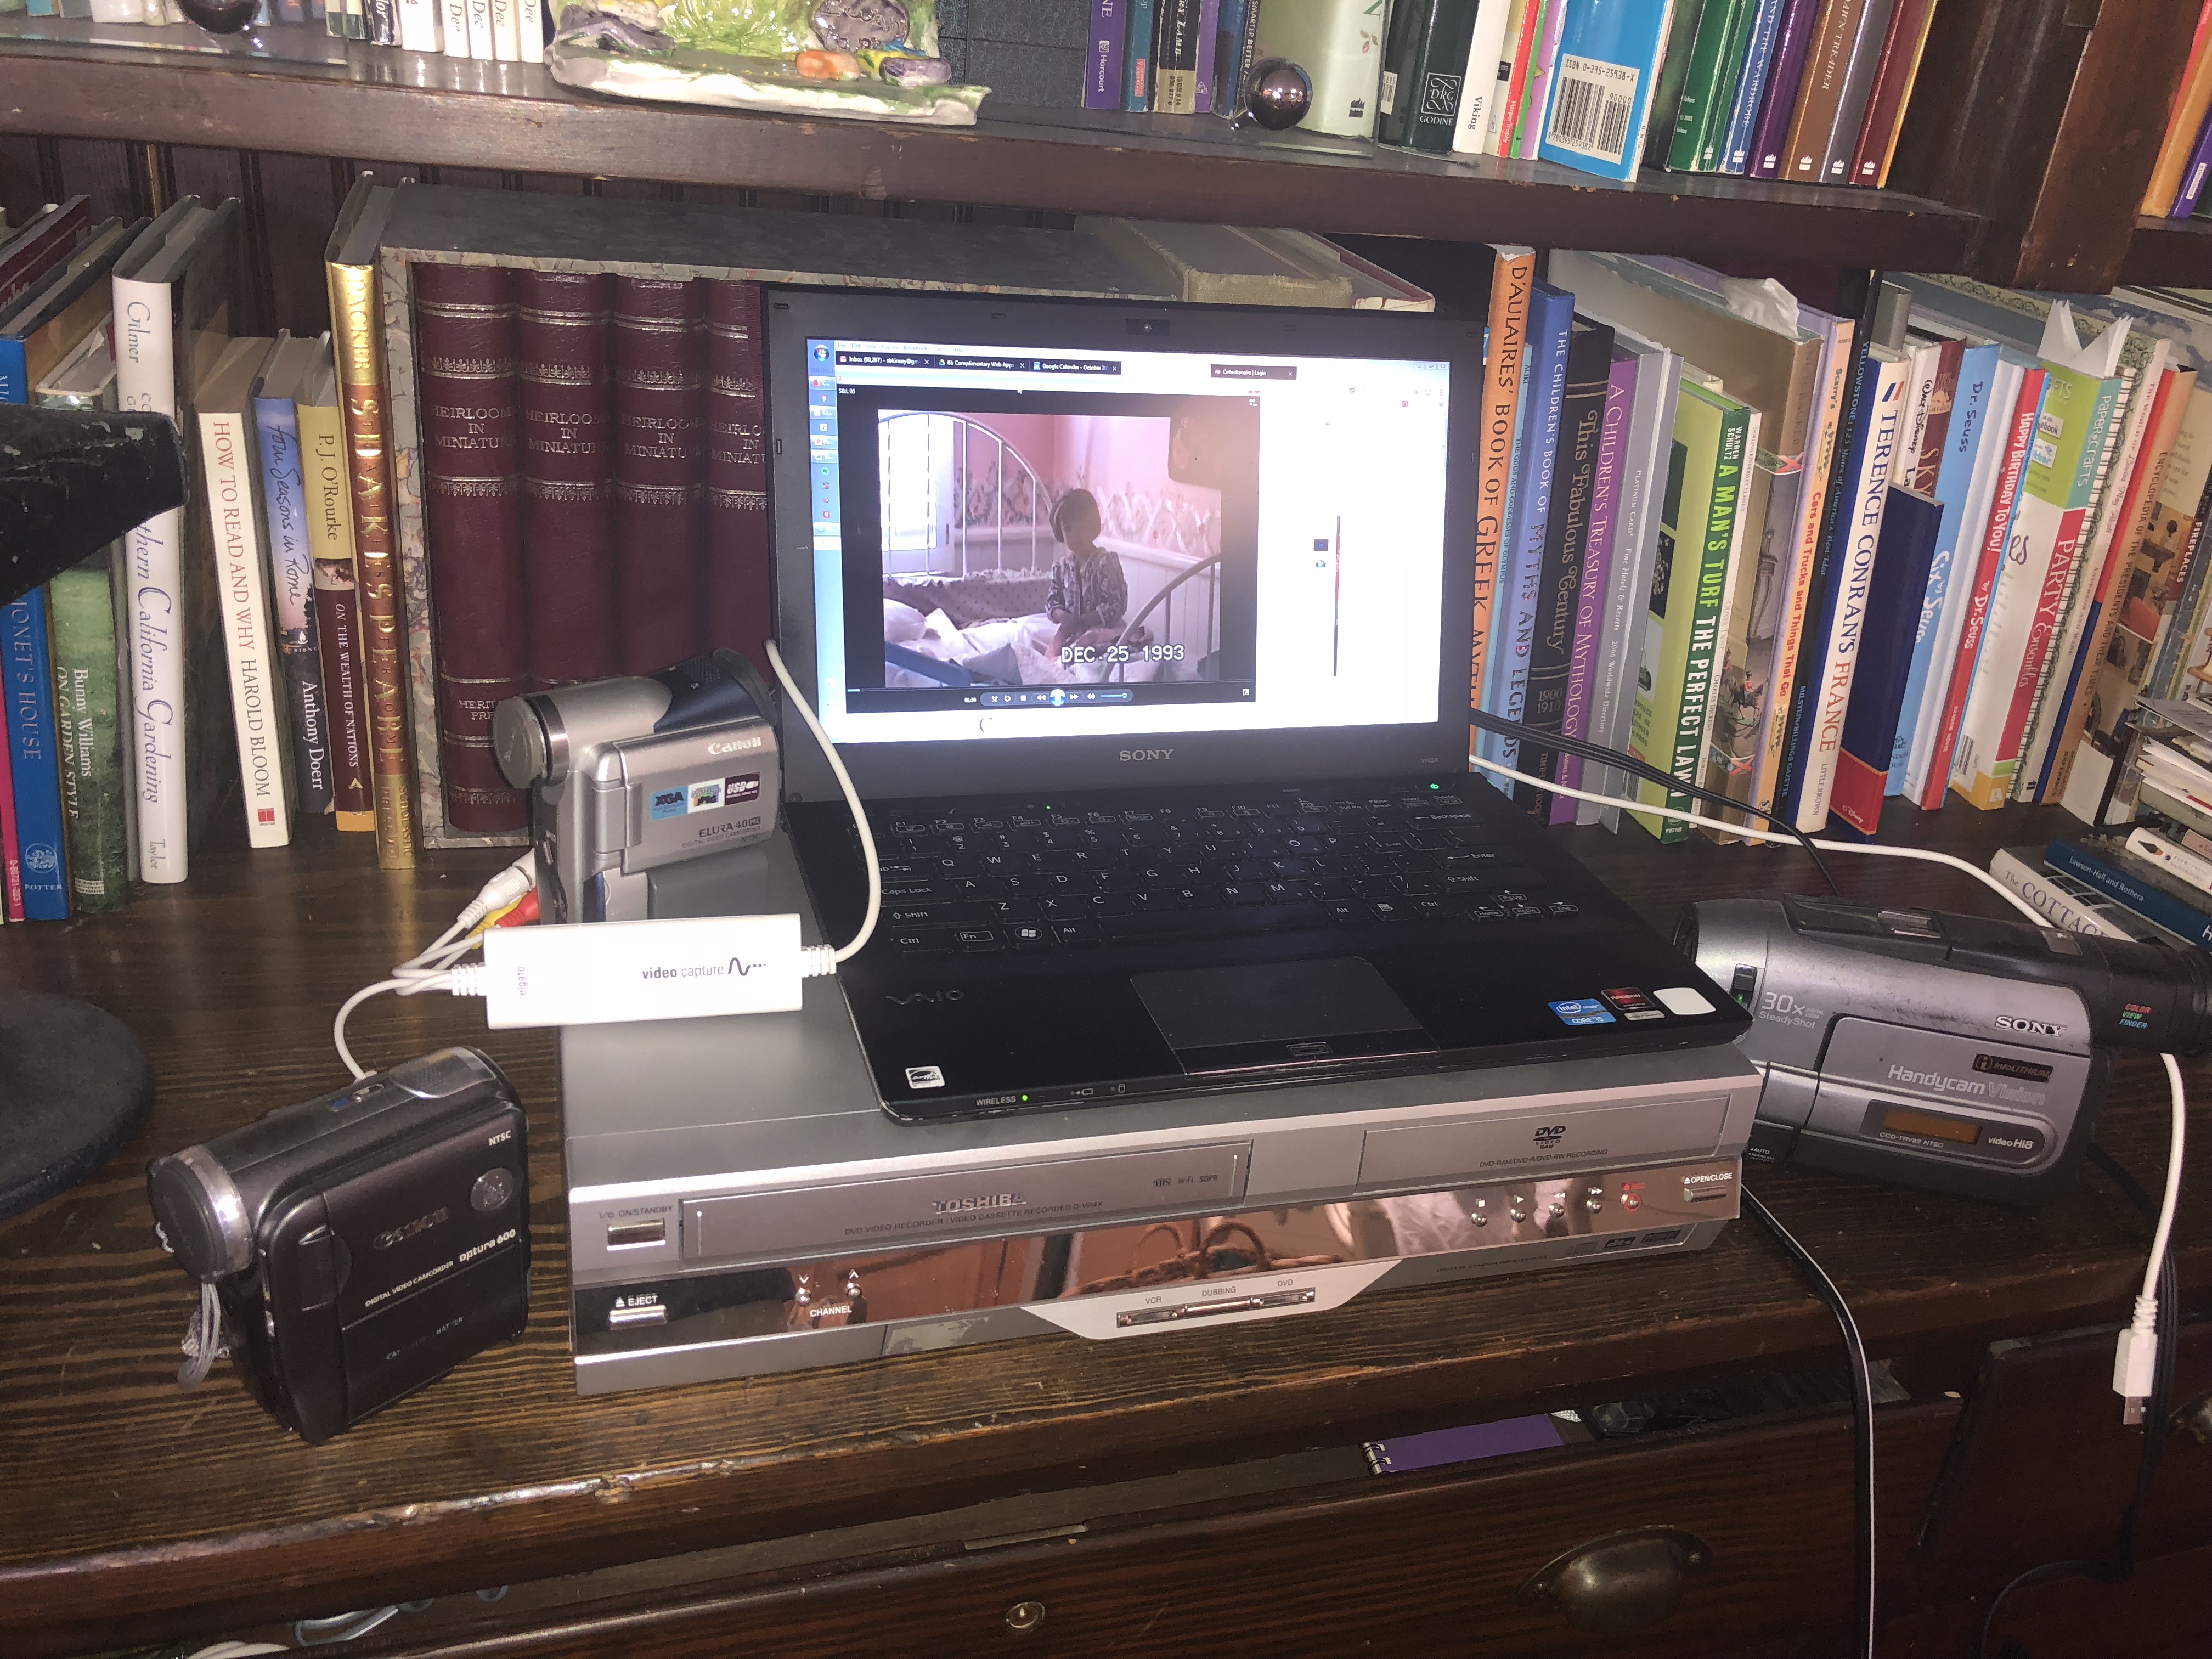
Once we received the device, we downloaded the software to a laptop and arranged a simple transfer setup with the elgato connecting either the VCR or one of the cameras to the laptop. Over the next three weeks we’d load a new tape whenever we walked past. When the VHS tapes were done we moved to the old Sony analog camcorder and, finally, the Canon digital tapes.
Important - You’ll want to make sure you put a good file name onto each resulting digital file during each transfer so that each resulting file will match up with the tape it came from. Hopefully you had some form of label on your tapes to know what's on them. And you’ll want some type of file naming system. Perhaps the most important info is the year it was taken; then some of the content. For example, you naming system could be
[year]-[start month (if available)]-[a,b,c,…][description],
such as:
“1996-12-a Florida trip with kids”.
If you don’t know the date, you might play the video and try to guess at least the year as it will make managing the video file easier later.
In the end, we had a file folder with over 80 titles. We then spent a few days uploading these to DropBox. Other Blog and Help & Support titles will help you learn your cloud storing options, and how to proceed.
Great Feature for Videos in the Cloud
One incredible feature is that videos stored in Vimeo, Google Drive and YouTube allow you to start the video at a specific moment in the movie. So if you have a child's piano recital at minute 32, second 14 you can have the movie start playing at that point. This will be highly usefull as you start indexing great moments in MyFamilyArchive. Please see our Help entries on this feature.
All-in-all it’s a pleasurable task. But don’t be surprised if you find yourself sitting there watching your old videos as they transfer. It’s hard not to!